Historically, photography has always been a discipline under constant innovation. From the first pinhole camera to the newest mirrorless sensors, our quest for visual perfection has ceased to slow down.
Despite all the progress, no innovation has been quite as revolutionary as the ability to capture images from the air, while the photographer’s feet remain on the ground. Drone photography has only been around a few years, yet the gravitational pull it has had on the industry at large is unprecedented.
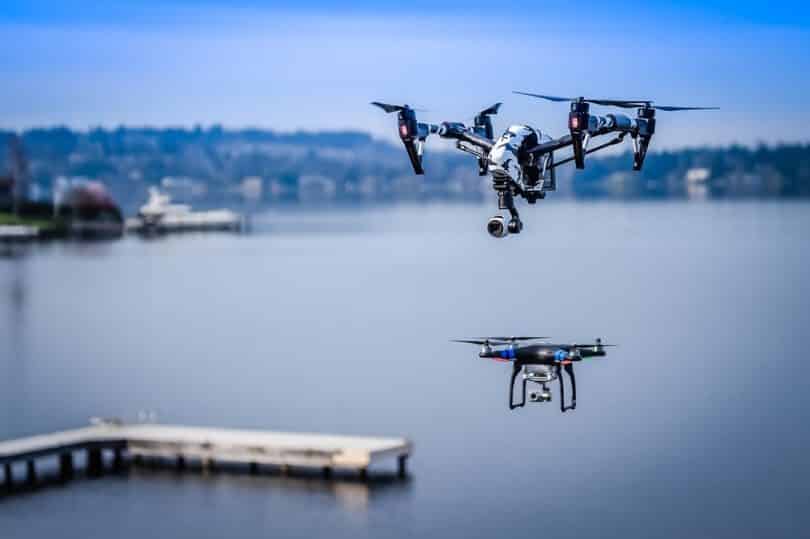
Perspectives that used to require a ride via an airplane or helicopter can now be achieved using UAV’s (unmanned aerial vehicles, also called drones) that cost less than it would to rent a helicopter for an hour.
If you are like the thousands of other photographer’s who cannot wait to take their lens to the skies, we have created this post as a guide to capturing images like a professional. Many are nervous at the thought of flying an expensive apparatus, and that’s why we want to begin with discussing what drone will be best for you. All of the topics we’ll cover in this guide include:
- Investing in the right aerial photography drone
- From purchase to practicing safe flying
- Shooting modes and general exposure settings
- Drone camera filters
- Post-processing drone photography
- Becoming a professional drone photographer
START BY INVESTING IN THE RIGHT DRONE
As tempting as it may be to buy a drone capable of flying your professional DSLR, most remote pilots will begin by investing in a consumer grade UAV with a built-in camera. Not only is it important to become skilled in flying a drone while attempting to capture photographs, but it is also important to understand what you actually need from a specific model.
It’s true that while drone technology has come a long way, the built-in cameras are still slowly catching up to the specs we’re used to seeing in consumer to professional grade camera bodies. Your intended application should be the primary consideration as you compare the models currently available.
Here are a few questions to ask yourself as you assess which is the right aerial photography drone model for you.
Will You Need the Capability to Shoot in Raw?
As a photographer, the ability to shoot in raw can be vital to the post-processing of an image. Those familiar with landscape photography will quickly learn taking images from the sky presents a similar challenge of high-contrast scenes and the necessity for flexible editing.
Most newer drone models will have raw file formats built in; however, some of the older and less expensive models may only shoot in jpeg. If you’re looking to use the drone immediately for professional quality images, investing in a raw-capable setup might be the best choice.
What Sensor Size and Megapixels Will You Require?
The next most common consideration for quality enthusiasts is how many megapixels will the sensor produce, and how well can the sensor handle low-light. Ranging from 30 MP in top models like the Inspire 2’s Osmo camera, down to 2 MP in the Force1 Quadcopter, a drone’s sensor can dramatically affect the price and quality of the image.
For those interested in printing their images as fine art pieces, or capturing files for professional clients, it is smart to consider a model permitting 20 MP stills. In conjunction with a larger file, most 20 MP drone cameras will also have a 1” CMOS sensor allowing you to boost the ISO in low light situations, which will greatly improve the accumulation of noise on the image.
If your priorities for drone photography are limited to sharing on social media platforms, settling on a 12 MP model, or smaller, will still allow you to capture stunning perspectives with respectable quality.
How Much Versatility Will You Need?
By nature, drone photography can be very adventurous, and how much space the drone will consume in your pack has become a large part of the discussion. The drone community tends to agree the best combination of image quality and portability goes to the new Mavic 2 Pro.
With a 20 MP sensor and a weight of only 5.51 pounds, it’s hard to beat the ease in which you can deploy it in any situation.
That said, if your primary consideration is image quality, you will likely want to consider a model that is larger and more affordable, but can capture images of equal quality.
FROM PURCHASE TO PRACTICING SAFE FLYING
The most intimidating day in a remote pilot’s career will be the first time the drone leaves the ground. It is imperative that you execute every flight operation with the same sense of caution, but once you complete that first day of practice it is easy to understand just how incredible these machines are at not falling from the sky. In fact, most people who regularly fly drones will tell you it’s incredibly easy.
When it comes to flying while attempting to capture beautiful imagery, you will want to consider the mantra of ‘fly first, capture second’, which places an important emphasis on not prioritizing the shot you want over losing the drone or causing someone serious injury.
Remote Pilot’s who have already gone through the associated Part 107 testing will know there are primary regulations you want to abide by during every flight to ensure safety while capturing images. These include:
- Always retain a line of sight on your drone – It can be easy to get lost in watching a scene unfold on your controller’s monitor and not notice your drone is heading dangerously close to a line of trees out of your sight. Position yourself in a location that maximizes your field of view before launching the UAV.
- Pay attention to the weather, particularly wind – One of the main causes of drone accidents is bad weather. Every model has variations when it comes to how much wind velocity it can handle while in flight. It is your responsibility to read the manual and know what constitutes an acceptable day to fly. Even if your drone can remain aloft, it can sometimes be impossible for the drone to return back to you if the winds are too strong and the battery runs out.
- Do not panic – It isn’t uncommon for a drone’s video signal to be lost on the monitor mid-flight, and when it does happen many pilots will immediately panic and assume their drone has crashed or has flown away. This is another emphasis on retaining line-of-sight, and fortunately, most models have a return-to-home button that will override a lost video signal.
- Do not exceed 400 ft AGL – One of the rules you will hear time and time again is do not fly your drone higher than 400 ft above the highest elevation or structure on the ground. Flying above 400 ft may also increase the UAV’s susceptibility to high wind speeds.
The nice aspect of capturing photos over video with drones is that the process eliminates the cinematic maneuvering necessary to achieve specific shots. Ultimately you want to become a skilled drone pilot before you become a skilled drone photographer. For more important safety tips we recommend diving into our guide, How to Fly a Quadcopter.
SHOOTING MODES AND GENERAL EXPOSURE SETTINGS
Now that you have the mindset of what is required to begin flying, let’s dive into the most important settings related to drone photography. Prior to the drone ever leaving the ground, it’s a good idea to select your shooting mode, adjust the camera’s exposure settings, and ensure the gimbal has calibrated so the camera can capture level photos.
Shooting Modes
Just like a DSLR, a drone comes equipped with automatic, aperture, shutter speed, and manual modes allowing you to operate based on your experience level and overall needs. For beginner’s, it is always recommended to try out the automatic settings while you get used to flying and gradually build in more control once you’re comfortable.
The Benefit of Manual Mode
The best way to achieve a desired aesthetic for your drone images is to have full control over the camera. Auto mode is impressive for how often it will get the image right, but once you start experiencing low-light or flight instability, you will better understand which settings compliment aerial photography.
Shutter Speed
Similar to taking handheld photos on the ground, your shutter speed in the sky will be a primary factor in image clarity. On calm days lacking wind, newer drones are capable of exposures several seconds in length, which can be achieved using the tripod-mode found in certain models.
Shutter speed may also be crucial to properly exposing a scene, as most drones are limited to an F/stop of 11, or less, and you may need to have a faster shutter to prevent too much light from hitting the sensor. Other options for limiting light include neutral density filters, which we will touch on later.
A good rule of thumb when selecting your shutter speed is to take the focal length of your lens, double it, and then consider any other factors; for instance, if your drone has a 24 mm equivalent, avoid shooting less than 1/50th of a second unless the operation is in stable air or you are using tripod mode.
Aperture
Drones capable of variable apertures is actually a new innovation. In the past, most had a fixed f/stop of 2.8, which even for a wide angle lens limited the depth of field and allowed in too much light to achieve long exposures.
Today we’re seeing most new models built with lenses varying from f/2.8 to f/11. In the Phantom and Mavic lines testing has shown f/5.6 to be the sharpest, with narrower f/stops performing nearly as well.
Since image sharpening is an easy task in post-processing, prioritize using the aperture as a tool of exposure first, and aim to hit f/5.6 whenever possible.
ISO
The biggest potential downside to drone camera sensors is the ability to boost the ISO. Unlike top mirrorless models found in the like of Sony and Canon bodies, drone sensors begin to strain beyond ISO 400. In shooting modes like Auto and Aperture/Shutter, you will notice the camera controls the ISO automatically.
As you begin to perfect your aerial images it’s wise to experiment with ISO and take note as to which value produces the cleanest images.
Most professionals will only increase the ISO beyond 200 when shutter speed and an open aperture are not enough.
Shooting Bracketed Exposures in AEB Mode
AEB Mode, or Auto Exposure Bracketing, is a technique used across many photography niches, most notably landscape, real estate, or any scene that displays a high range of contrast.

Image Source: Jeremy Jensen
Drone photography is no exception as flying outside will present mostly high contrast scenes.
Auto Exposure Bracketing can be set to take up to five exposures instantly, allowing the photographer to merge the exposures in an HDR software or manually mask and blend the images to achieve a much higher dynamic range.
Even when shooting in raw (.dng), the files are inherently less flexible than most DSLR files. For this reason, professionals will almost always bracket to ensure they have options later while editing.
Color Profiles
One of the final considerations we find important to the look and dynamic range of your images is the option to set a color profile while capturing.
DJI’s software gives you the option to select D-Cinelike, D-Log, Normal, TrueColor, Art, Film, B&W, or Cool. Each will apply an adjustment to the image’s histogram, whether that’s evening out the highlights and shadows, popping the saturation, or simply cooling the white balance.
Raw photos are much easier to color correct than video, and so unless you prefer capturing in a certain style, there’s no absolute need to stray away from the normal color given how much can be achieved with bracketing raw files.
DRONE CAMERA FILTERS
Neutral Density, Polarizers and UV filters are going to be the main accessories in your drone toolkit. As mentioned in the exposure settings, there will be situations when you’ll need extra support blocking or enhancing the light hitting the sensor.
Neutral Density Filters
The ND, or Neutral Density filter will likely be your most useful filter when it comes to getting the proper exposure. Since drones have begun normalizing minimum apertures of f/11, and can snap the shutter at over 1/4000th of a second, the ND usually won’t be necessary when trying to limit light unless your aperture is fixed at f/2.8, or you’re attempting to take a long exposure.
ND’s are primarily a video tool as the camera’s shutter will usually not exceed 1/120th of a second (While shooting at 60fps).
The best utilization of an ND for drone photography is using them to create motion is long exposures. Many feel that depending on the quality of the ND filter, using one can also degrade the clarity of an image.
Polarizing Filters
Polarizing filters require a bit more practice to be useful but when executed properly can greatly enhance the contrast and tones in your images.
These filters come into play when you’re trying to reduce the glare of light off a reflective surface, like the sky or a large body of water. They need to be rotated correctly to match the glare in a scene, otherwise the glaring may actually be enhanced.
UV Filters
Unless there’s a distinct need for either the ND or Polarizer, most professionals will keep the factory UV in place knowing the real importance relies on just getting good exposures. Since most drones have just the one built-in lens, make sure to always have this filter on when in transit as it would be very costly to replace the camera due to a scratch on the lens.
POST-PROCESSING DRONE PHOTOGRAPHY
The exciting thing about post-processing an image from your drone is that it can be done right on your phone for quick sharing. Although, we recommend the traditional approach on a computer using popular software like Adobe Photoshop or Lightroom for the best results.
By taking the time to capture your images with the correct exposure, or in bracketed sets, you should have unlimited possibilities when it comes to the final look and creative style you wish to promote. This post is not for how to edit, but some important editing steps to consider when processing drone images include:
- Applying an unsharp mask – Flying your drone several hundred feet in the air means your subject will be significantly further away than most images shot on the ground. Sharpening is a common way to strengthen small details that are quickly lost with distance.
- Clone stamp out unwanted objects and people – You will immediately notice capturing images from the sky will incorporate vast scenes, often with unexpected details. In Adobe Photoshop the clone stamp tool will allow you to quickly “clone” pixels around the object you wish to remove, which is a nice backup plan when you cannot avoid a person or thing while capturing.
- Don’t forget to crop and straighten – Despite the camera capturing from a balanced gimbal, you’ll likely come across a batch of images that has a slight skew or crooked horizon.
- Practice selective noise reduction – As mentioned in the ISO section, drones are notorious for noisy images, especially in the shadows. Selective noise reduction can be achieved by using a brush tool and ‘selectively’ brushing a noise reduction filter over areas that were subject to missing information.
Blue skies and safe flying out there!
Source: https://uavcoach.com/drone-photography/